Installing Linux
If I would check the time I’ve spent on installing Linux versus time I’ve spent actually using it, I guess it would be 90% installing it and 10% using it! Ha! Ha! I hope one day this will change. No matter what, I am taking some notes here on my latest attempt of installation. This time, I’ll re-explore Arch Linux. The ISO could be downloaded here.
The following procedure is based at 99.99% of the very good video on YouTube here.

So I place the install CD or USB stick in the computer for the Arch Linux install and I boot until it reach the prompt.
I need to load in memory the proper keyboard layout so I enter:
loadkeys ca
I enable network time synchronization:
timedatectl set-ntp true
We install package for the reflector which will give us latest Pacman mirrorlist and let’s install at the same time the one for ssh:
sudo pacman -Syy reflector
We may now set our mirror list to get the fastest one base on my region:
reflector -c Canada -a 6 --sort rate --save /etc/pacman.d/mirrorlist
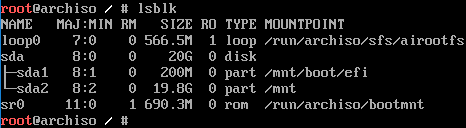
We may now check our disk:
lsblk
We will now create our partition with:
gdisk /dev/sda
We will first create a partition of 200MB for the EFI partition which will be type ef00 . We will create a second partition with remainging disk space for the system which will be of type 8300. We will then write this to this disk. It should give the following sequence:

We may verify what we’ve created with the lsblk command again:

We then need to format our EFI partition and it must be in FAT32 so I type this:
mkfs.fat -F32 /dev/sda1
Then we format our other partition in ext4:
mkfs.ext4 /dev/sda2
We then mount our partition for Linux installation:
mount /dev/sda2 /mnt
In order to mount our EFI partition we need to create the directory of the mounting point which will be /mnt/boot/efi so we type:
mkdir -p /mnt/boot/efi
So we’re now ready to mount our EFI partition. Don’t forget, it’s sda1!
mount /dev/sda1 /mnt/boot/efi
We may again type the lsblk command to check if our partitions are mounted as expected:
We may now proceed to the base packages so we type:
pacstrap /mnt base linux linux-firmware vim nano
Once finished we may have auto generate mounting points to our fstab. Please be aware that the fstab we need to set is in /mnt/etc/ and not already in /etc. Also, we append the result of the genfstab command to a fstab file that already partially exists we basically just the initial comment lines. So command is:
genfstab -U /mnt >> /mnt/etc/fstab
We may give a look at our fstab by doing cat /mnt/etc/fstab and we should get something like this:

To continue our installation, we’ll now set the new location of our Arch Linux stsem witht this command to point its mountintpoint:
arch-chroot /mnt
We will then create a file four our swap file. It will be a 2 GB so we may write it this way:
dd if=/dev/zero of=/swapfile bs=1G count=2 status=progress
Now we need to set the permission to it like this:
chmod 600 /swapfile
Now we need to kind of format our file to be used as a swap location typing this:
mkswap /swapfile
We’re now ready to activate it:
swapon /swapfile
We need to don’t forget to add also this swap file into our fastab file! So let’s edit it with nano that we’ve setup earlier:
nano /etc/fstab
The line we’ll be added will be
/swapfile none swap defaults 0 0
So our /etc/fstab file will looks like the following:

We may now set our timezone. We will show the possible time zone and grepping what is probably the closest city for us. Let’s do the command:
timedatectl list-timezones | grep Montreal
If it finds nothing, let’s say with another city until it finds it:
timedatectl list-timezones | grep Toronto
So we may now set out time zone by linking to the correct file by doing this:
ln -sf /usr/share/zoneinfo/America/Toronto /etc/locatime
The sequence should looks like something like this:

We may now synchronize our clock with the following command:
hwclock --systohc
We may now our locale by editing like this:
nano /etc/locale.gen
In my case I’ve uncomment the following one:
en_CA.UTF-8 UTF-8
Now we may generate the locale by typing:
locale-gen
This should give the folloing sequence:

We may now create and edit using nano our /etc/locale.conf file. I use the first locale. It should looks like this:

We do similar for the keyboard by updating the /etc/vconsole.conf. At the end, it should looke like this:

We may now setup our hostname in the file /etc/hostname:

We now setup our hosts file still with nano in file /etc/hosts. Once edition completed it should looks like the following:

With passwd, we set the root password.
And now it’s time to install the bootloader! Fianlly! We neded to install packages for that and since we’re there, we’ll install a few other packages so our machine will have time. So we type:
pacman -S grub efibootmgr networkmanager network-manager-applet dialog os-prober mtools dosfstools base-devel linux-headers cups reflector openssh git xdg-utils xdg-user-dirs
We’re now redy to install grub by typing the following:
grub-install --target=x86_64-efi --efi-directory=/boot/efi --bootloader-id=GRUB
Now we need to have a configuration file to be generated by typing this:
grub-mkconfig -o /boot/grub/grub.cfg
We many now enable some services by typing the following commands:
systemctl enable NetworkManager
systemctl enable sshd
systemctl enable cups
Let’s create a new user like this:
useradd -m netuser31
Now let’s set the password of that new user by typing this:
passwd netuser31
We may now exit the installation and go back to the installer by exiting:
exit
We then unmount all the partitions. It gives probably nothing but the guy on YouTube was doing it.
unmount -a
We may now reboot:
reboot
After that, we may remove the CD or the USB stick and the machine show boot normally and we should get this:
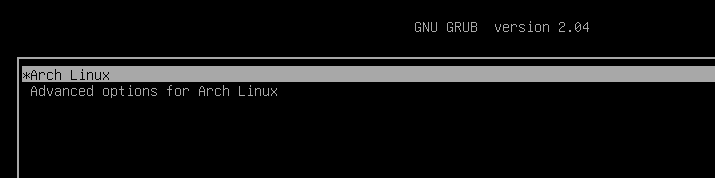
And then if we select ArchLinux, we should boot our installed Arch Linux and reach our login prompt:

So now that we have the basic Linux installed, let’s instal our display server and desktop environments. Let’s install at once these and with some applications by typing:
pacman -S xorg lightdm lightdm-gtk-greeter xfce4 xfce4-goodies chromium materia-gtk-theme papirus-icon-theme
After will be install, we need to enable the lightdm manager. We accomplish that by typing this:
systemctl enable lightdm
We may now reboot.
reboot
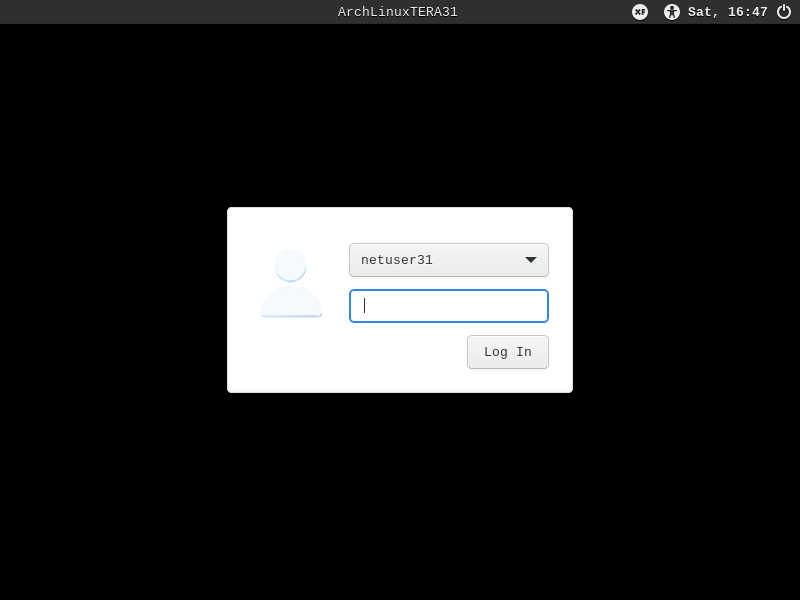
If things has been installed successfully, we shoulw see the lightdm display manager log in screen like this:
Once logged in, we should see our xfce desktop, finally, for the first time:

After that we may configure our display by going here:

We may adjust the look at the desktop by doig these adjusments:

After that we might want to right click on the desktop to set our desktop background:

Finally, at the end of all this, we have our Arch Linux personal desktop ready to be used!
