
pyenv – first contact
I think I wrote somewhere here that this pseudo-blog is probably more for myself than to share anything with others. I wanted it to be a place where I could take notes and come back later to read them either as a reference, see the few things I’ve done and maybe also to laught at myself. This article is a mixed of all these.
I want to talk about pyenv. Pyen was presented to me as the best way to be able to work with various Python versions on the same computer. I was told it was possible to select which Python versions we want to use to run a specific script. I was explained that we could set things so one project in one directory would use a certain version of Python and then another directory would use another one.
But what attracted me the most about pyenv is the fact that I heard that we could kind of install many modules to be used with a project, and then work with another project but without these modules and like starting from scratch. I really like this idea. I think under the hood PyCharm could do the same but it could be interesting to know better what actually take place instead on rely on the magic automatism of PyCharm.
This post is based totally on a video on YouTube I’ve just seen. So from here, you may totally ignore my post on go to this link and see the video ?. Me, I will continue to write as it will help me to remember the principle and how it works. So the video is made by a German named Konstantin Lübeck. Here is the link to his wonderful video about installing and using pyenv:
Also, you may go to see directly his post on the matter where he clearly explains how to install pyenv in Windows: How to Install Multiple Python Versions on your Computer and use them with VSCode | k0nze
So again, you may stop reading here and go directly to see his video and his article because mine is simply a pale kind of copy and paste of what he did!
Step 1 – Downloading pyenv
Apparently we need to downloand pyenv from its GitHub repository. So we click the following link on GitHub. Once there, you click on the Code and then Download zip. This will download locally pyenv necessary file. Keep it in a known location, we will come back later how to use it.
Step 2 – Create a pyenv directory
In fact, it’s a .pyenv directory we will create. In this location will be stored all the different Python version we will download. Konstantin have it created in our user directory. So we will do that type the following:
mkdir $HOME/.pyenvStep 3 – Unziped pyenv in the new created directory
We won’t unzip the whole thing. In the zip, there is a folder named pyenv-win and also a file named .version. That’s the only two thing from the zip downloaded on step 1 that we will uncompress directly in our recent created .pyenv directory. So directly in that directory we will have the directory pyenv-win and a file .version.
Step 4 – Set environment variables
We need to have envirnoment variables called PYENV and PYENV_HOME existing to point the installation location of pyenv. In the PowerShell, we may do that with the following commands:
[System.Environment]::SetEnvironmentVariable('PYENV',$env:USERPROFILE + "\.pyenv\pyenv-win\","User")
[System.Environment]::SetEnvironmentVariable('PYENV_HOME',$env:USERPROFILE + "\.pyenv\pyenv-win\","User")
Step 5 – Add a path to PATH environment variable
We need to add the BIN path of pyenv to the system environment variable PATH. Still under PowerShell we may do that with the following command:
[System.Environment]::SetEnvironmentVariable('path', $env:USERPROFILE + "\.pyenv\pyenv-win\bin;" + $env:USERPROFILE + "\.pyenv\pyenv-win\shims;" + [System.Environment]::GetEnvironmentVariable('path', "User"),"User")Step 6 – Enable script execution in PowerShell
This is maybe a kind of optional step since you may have already done that for something else in the past. But in case it’s not already done, here is the procedure showing how to do that.
First, you need to have the ADMIN priviledges to be able to authorize that so launch a PowerShell as an administrator on your machine.
Then type and execute the following command:
Set-ExecutionPolicy unrestrictedWhen prompted, press A key to confirm you want Yes to all:

We may now close that Windows PowerShell.
Step 7 – Launch pyenv to see if it works
For this, launch a new Windows PowerShell. If you got the following result, it’s because we’ve done things correctly!

As Konstantin mentioned, we might run through security issue where it would be blocked. If so, we may unblock pyenv blocking by typing the following command.
Unblock-File $HOME/.pyenv/pyenv-win/bin/pyenv.ps1We are now ready to actually USE pyenv!
Installing a Python version
Once pyenv is correctly installed, we may use it to install the Python version we want. We will do this by using the following command:
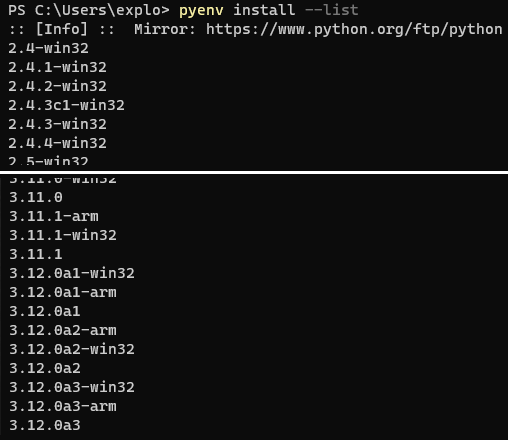
pyenv install [PYTHON_VERSION]We may see the possible version to install by invoking the following command that will list the available ones:
pyenv install --listWe will get a long list of the available versions similar to the following:
So let’s suppose we want to install version 3.10.9 we will simply type the following:
pyenv install 3.10.9If things goes as expected, we will get the following result:

Selecting the python version to use
As mentioned at the beginning, pyenv allows to have many python versions on the same computer and allowing which one to use. So basically we will install various version like the section mentioned before and then we will select from them which one will be the defautl one to use.
Ir order to select the one to use, we may need to know which are actually present installed on the machine with pyenv. To list them, we will use the following command:
pyenv versionsIn the specific case of my machine at the moment of writing this, here is the result:

So from that, we see the activated one is 3.9.6. We may validate that by laynching python and see the wlcome message:

But now, let’s suppose we would like to switch to the version 3.10.9 we’ve just installed and that we see present on our machine. The command to type would be the following:
pyenv global 3.10.9If things goes well, whne we will launch again Python, we should see the expected 3.10.9 version:

Without changing the default Python version to use, we may change it temporary for the current terminal session we are running. So do this we will use the following command:
pyenv shell [PYTHON_VERSION]Finally, another nice possibility is that as soon as we switch to a specific directory, we may specify the Python version we want to use, which could be different than the one from the global one or from other directories! DTo do so, simply switch to the Python project directory that requires a specific Python version, let’s say 3.11.1 and once in there, type the following command:
pyenv local 3.11.1Virtual environments
This is ultimately the most interesting feature of pyenv I wanted to use. It’s the fact that for a specific Python project we can pip install library that one project need without interfering with another project. In other words, in a specific directory location a module will be available, but for another, it won’t! I find this particularly useful when you want to explore a library, to test it, without having it stick in your actual day-to-day Python installation! ?
Here is how you can do that.
First, go in the root of your project and make sure you’ve set the correct local version of Python you want to use when in it, with the command like this:
pyenv local [PYTHON_VERSION]Then, type de following command:
python -m venv .venvThis will create a directory .venv directory full of stuff, like mainly the selected Python version you’ve selected. But more than that! It will also be the location where pip install will install the libraries you want to use for that specific project in that specific directory!
But we need to do one more step to have this effective. We need to activate it. To do so, type de following command:
.\.venv\Scripts\activateIf things goes well, the shell will now show the (.venv) in front of the prompt confirming us we are currently running in the virtual environment. See the example here:
We are now ready to do our python -m pip install [LIBRARY]!
IMPORTANT: We need to do activation for each session
It’s important to notice that from a session to another, it’s important to activate our virtual environment each time!!! Otherwise, it won’t use the library we’ve just set above!
Conclusion
That’s it for my little poste on pyenv. I am sur I will refer to it a few time in the days. In fact, as I was writing the draft of it, I kept coming back at the same thing to actually use it! I am now about to post it public. It will be easier for me to copy-and-paste from it!